August 25, 2026
Balcony and Loggia: Turning a Storage Space into a Favorite Spot
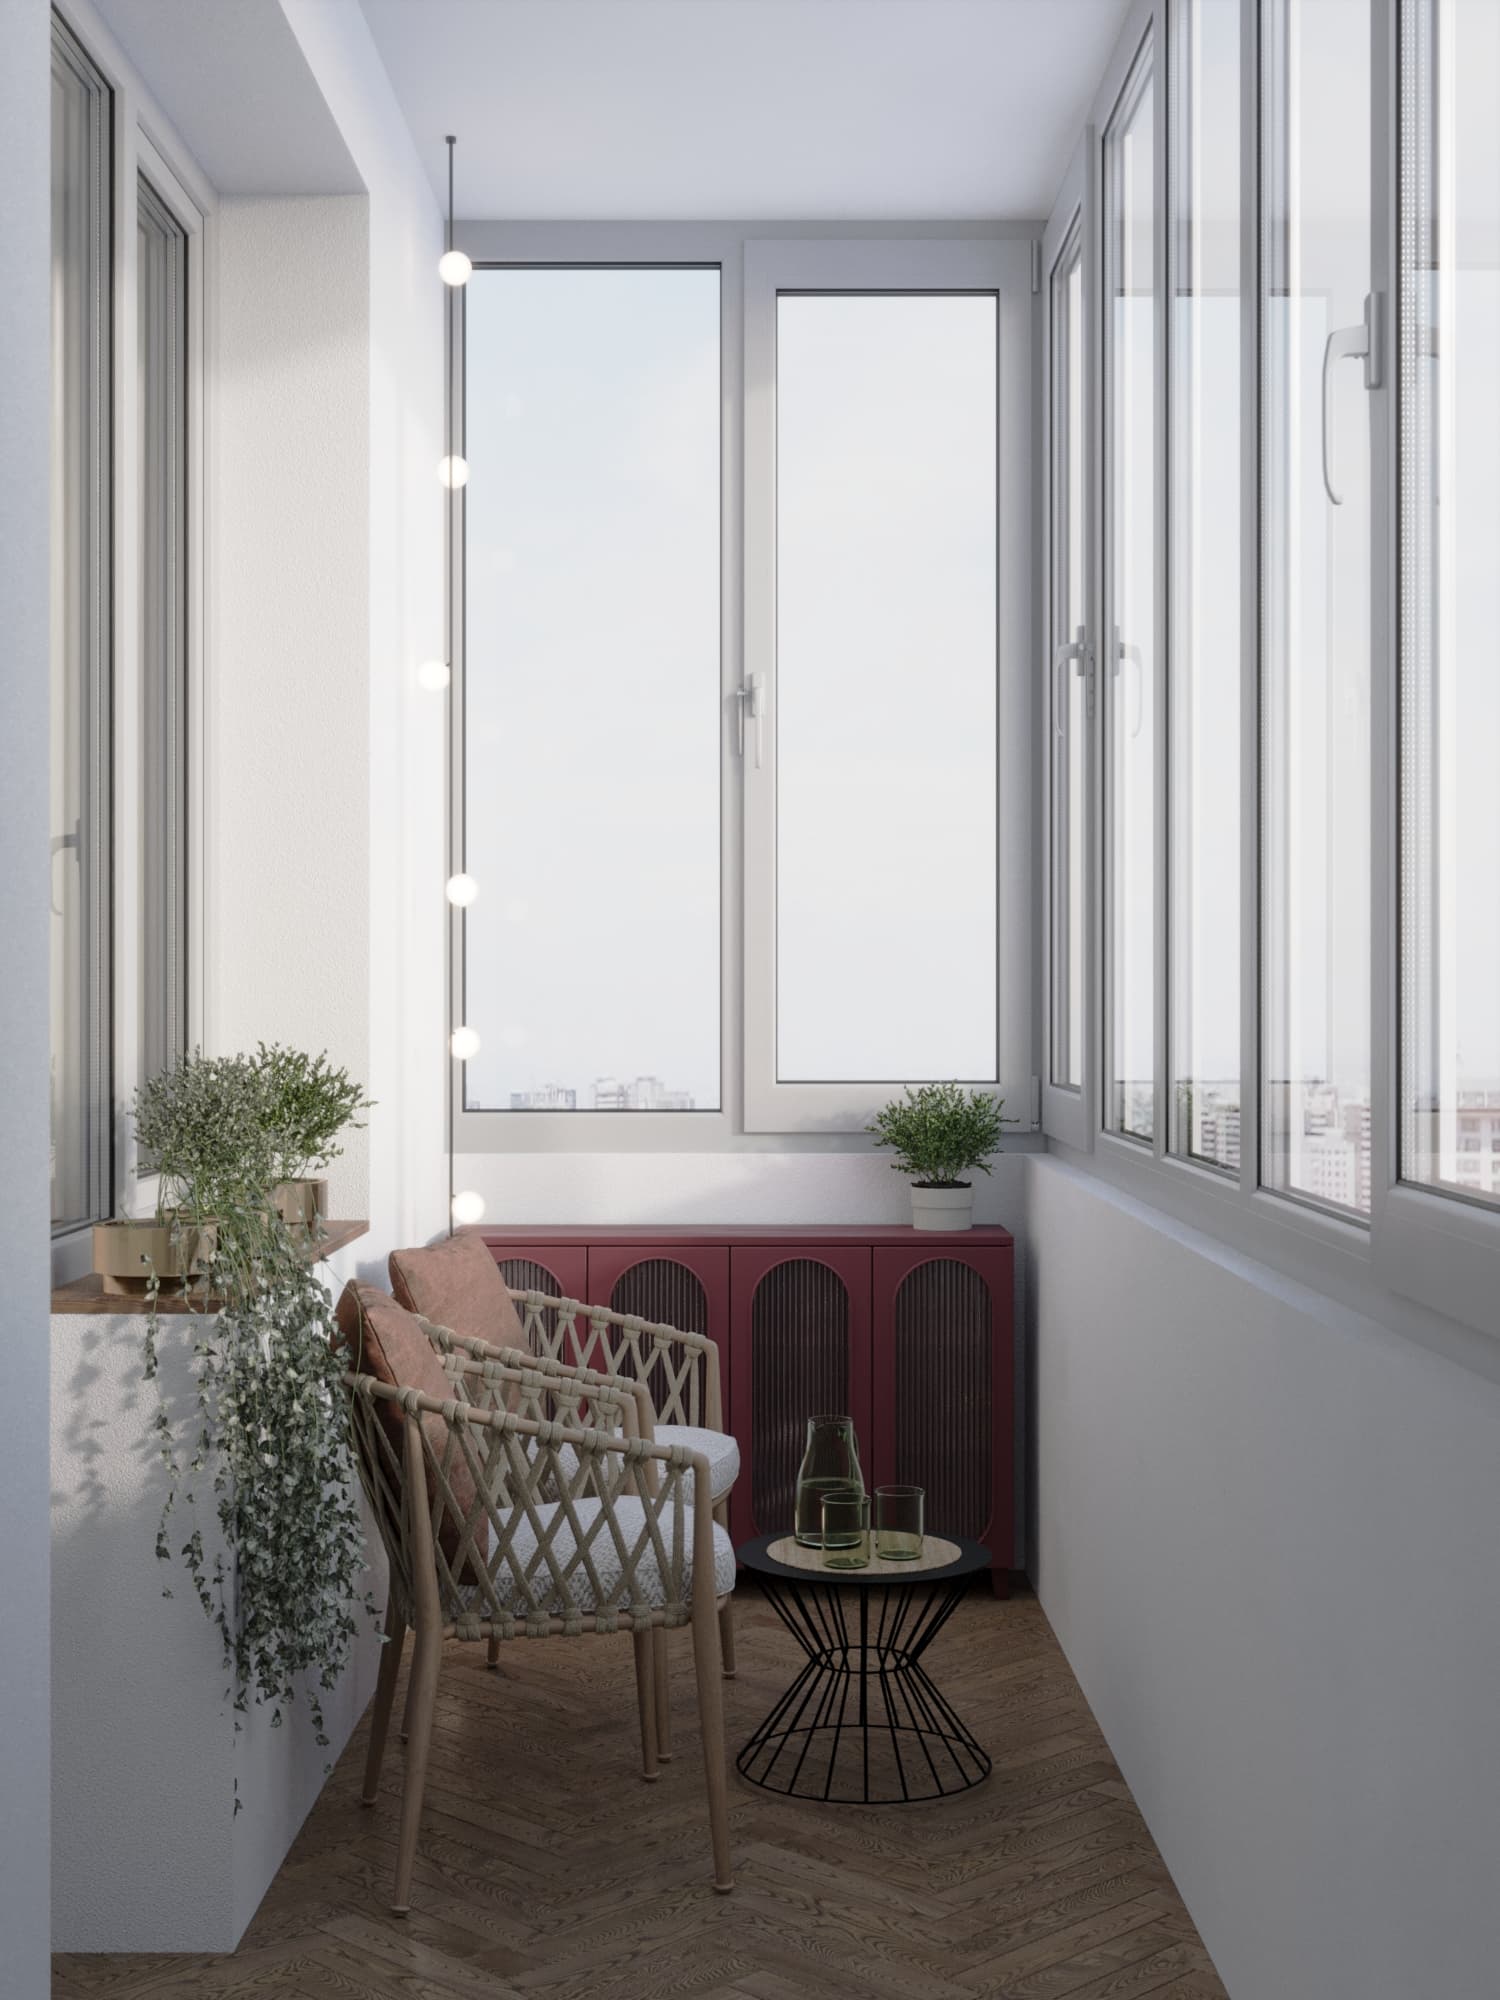
In most apartments the balcony lives the same life: boxes, sleds, jars, an old vacuum cleaner. Yet these are square meters you have already paid for, and they simply do nothing. In our projects the loggia almost always becomes a satellite room: a coffee spot, a small workspace or a lounge with plants.
Below is how to approach it step by step: how a balcony differs from a loggia, what you can do on your own and what needs approval, how to glaze and insulate properly, how to heat it and how to furnish it. At the end you will find the mistakes we see most often on site.
Balcony or loggia: why it matters
A balcony is a slab that projects beyond the facade and is supported on one side only. A loggia is recessed into the building: it has three walls and its floor rests on the building structure. The practical difference: a loggia is easier and safer to insulate and turn into a warm room, while a balcony should not carry heavy constructions.
For a balcony we usually recommend light glazing and light finishes, with no thick cement screed, brickwork or massive furniture. If you want a warm room on a balcony, first have the slab assessed and ask your management company or owners' association what is allowed on your building's facade.
What is allowed and what needs approval
A disclaimer first: we are not lawyers, and the rules depend on the specific building and the local architecture authorities. So we describe how it usually works in Kazakhstan and recommend checking the details with a public service center (TsON), the akimat or a licensed designer.
As a rule, finishes, electric underfloor heating, furniture and lighting inside the loggia do not require separate paperwork. But even replacing the glazing or insulating may require approval if the look of the facade changes. In new residential complexes the management company often has its own requirements for frame color and glazing type, so ask in advance.
Joining the loggia to a room by removing the window-door unit and the wall below the window, enlarging a balcony or any facade change is already a redevelopment or reconstruction. It is usually done only with a project and approval, and if common property is affected, consent of other owners may be needed. Moving central-heating radiators onto the loggia counts as altering building services: it cannot be done without a project and approval, and in practice such changes are generally not approved because they disrupt the shared heating system and the building's thermal envelope.
The consequence of unauthorized redevelopment is not just a fine. The main problem usually surfaces at sale, mortgage or exchange: the plan in the technical passport does not match reality, and the deal is postponed until the changes are legalized.
Glazing: warm or cold
Cold glazing means light aluminum sliding frames with single glass. It protects from dust, rain and snow, but in winter such a loggia is almost as cold as the street. It works if the balcony is a summer zone or storage.
Warm glazing means PVC or thermally broken aluminum frames with double-chamber insulated glass units. Only this turns a loggia into a year-round living space. The downside is weight: heavy frames do not always suit a projecting balcony, so this has to be checked.
Also consider: at least one sash must open for ventilation, otherwise the glass will fog up in winter. If the windows face south or west, plan space for roller blinds, because in summer an unshaded loggia overheats badly.
Insulation step by step
The right order is: glazing; electrical wiring (cables, boxes for sockets and switches) before the walls are closed; insulation on all enclosing surfaces including floor, ceiling and parapet; vapor barrier on the warm side of the insulation; underfloor heating; finishes.
Mistake number one is insulating the walls and forgetting the ceiling and floor: cold comes from the neighbors above and below, and condensation appears in the corners. Mistake number two is a vapor barrier on the wrong side or with gaps: moisture from the warm apartment gets into the insulation, it gets damp and stops working. All joints of boards and membranes should be taped.
The thickness and type of insulation are chosen for the specific loggia: how much depth you can give up, whether the wall is concrete or masonry, and which way the windows face. We put these decisions into the drawings so the builders do not guess.
Heating, sockets and lighting
The legitimate ways to heat a loggia are electric underfloor heating or an electric convector. Water-based floor heating from the shared system is ruled out for the same reason as moving a radiator.
Electric floor heating is connected through a dedicated breaker and an RCD: manufacturers of cable systems such as DEVI require an RCD rated at no more than 30 mA in their instructions. The heating cable must not be shortened, so choose a mat or section to fit the area. The thermostat with a floor sensor goes near the loggia door at a convenient height.
Plan sockets around the scenario: for a study, a block at the desk plus one more point on the opposite wall; for a lounge, a socket by the armchair and one for string lights or a floor lamp. Lighting works best on two levels: general ceiling light and warm accent light such as sconces, pendants or an LED strip under a shelf. Then in the evening the loggia feels like a cozy room, not a utility closet with a bare bulb.
Scenario 1: a lounge
The most rewarding scenario is a place to drink coffee and exhale. In our completed Taldykorgan project (97 m², mid-century modern) the balcony became a proper lounge: furniture and lighting follow the same warm palette as the apartment, so the balcony reads as an extension of the living room rather than a separate storeroom.
What a lounge needs: two compact armchairs or a narrow sofa, a small table, soft textiles and plants, which usually get more light here than deep inside the rooms. Choose furniture that is light and tolerates temperature swings and sun: rattan, metal, oiled solid wood, outdoor fabrics.
Scenario 2: a study
A 3–4 m² loggia is a ready home office: a full-width worktop instead of the windowsill, sockets on both sides, shelves above. A separate door gives what often no room has: silence for calls.
Ergonomic guidelines: a work surface height of about 75 cm for an adult, and a depth of at least 60 cm if you use a monitor; a laptop needs a little less. Sit sideways to the window so the sun does not dazzle you or glare on the screen. Warm glazing, insulation and a heated floor are mandatory, otherwise the office works only half the year.
Scenario 3: storage without the mess
If you do need the balcony for storage, it can still look neat. Closed floor-to-ceiling cabinets at the ends, 35–45 cm deep, hold seasonal items, jars and tools without blocking the passage. The middle stays free for a chair or a drying rack.
Strollers, bikes and tires need a dedicated niche with hooks or a rack so they do not stand in the middle. Cabinet fronts in the wall color keep a narrow space from looking cluttered.
Checklist of mistakes
Starting finishes before running the wiring, then cutting into new finishes or running surface cable trunking.
Installing heavy warm glazing and a thick screed on a projecting balcony without checking the slab.
Insulating only the walls and leaving the floor, ceiling and parapet cold, which leads to condensation and mold in the corners in winter.
Moving a radiator or connecting a water floor to the shared riser without a project and approval.
Making all sashes fixed: the glass fogs up in winter and there is no way to air the space in summer.
Leaving the loggia with one ceiling bulb: it feels unwelcoming in the evening and turns back into storage.
The bottom line
A good loggia starts not with furniture but with decisions on glazing, insulation and wiring made before the renovation. If you order a working or design project of your apartment from us, we design the loggia together with all the other rooms: electrical plan, heated floors, lighting and furniture in one set of drawings.
You can estimate the project cost with the calculator on the Prices page, and if you want to discuss your loggia, fill in the project brief or message us on WhatsApp.